Intro#
Following up on the previous post, I’m going to configure my home server so I can access it from anywhere.
The exact goals of this setup are as follows:
- Anyone should be able to access the web server running on my home server. (:8080)
- Only I should be able to connect to the home server via SSH.
Usually, external access is handled through router port forwarding, and SSH is protected with authentication. But by using Cloudflare Tunnel, I can achieve the same goal safely without port forwarding.
All you need is a domain registered with Cloudflare.
What Is Cloudflare Tunnel?#
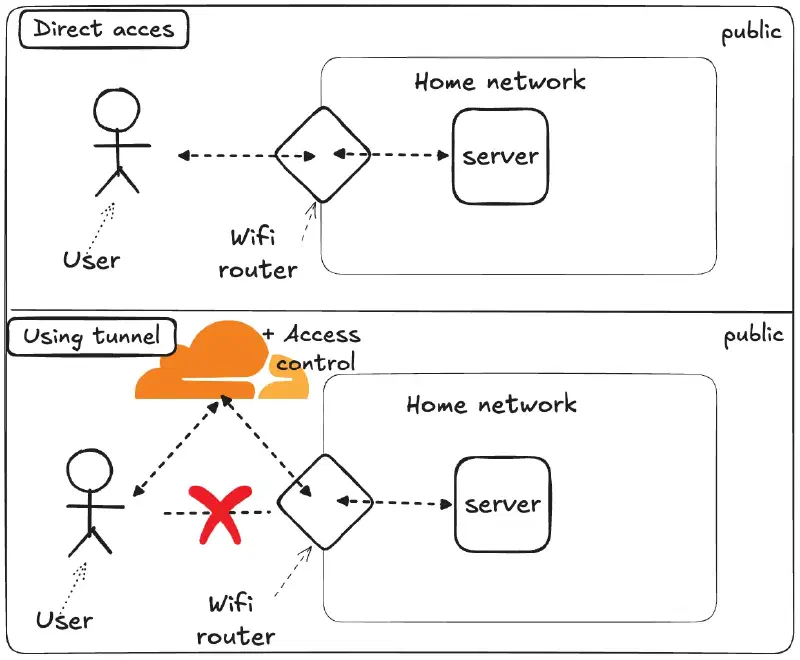
Cloudflare Tunnel is a feature that lets me access my server from outside through Cloudflare, without directly exposing the server to internet. If I use port forwarding on the router, external users directly enter through the inbound port of my home public IP address (router). But with Tunnel, cloudflared installed on the resource (home server) creates a connection to Cloudflare, and external users send requests to the resource through Cloudflare. Official docs
Without opening inbound ports on the router, I can access things like web servers or SSH from outside through Cloudflare.
Setup#
Tunnels#
Search for Tunnels in the Dashboard, then go to Zero Trust > Network > Tunnels. If this is your first time entering it, the Cloudflare One signup screen will appear, and you can sign up with the free plan.
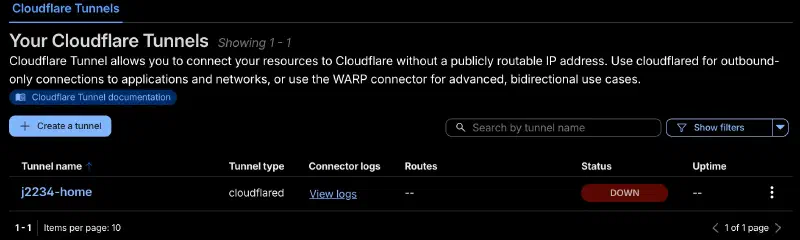
Click the Create a tunnel button, select Cloudflared, and just give it a name.
Connector#
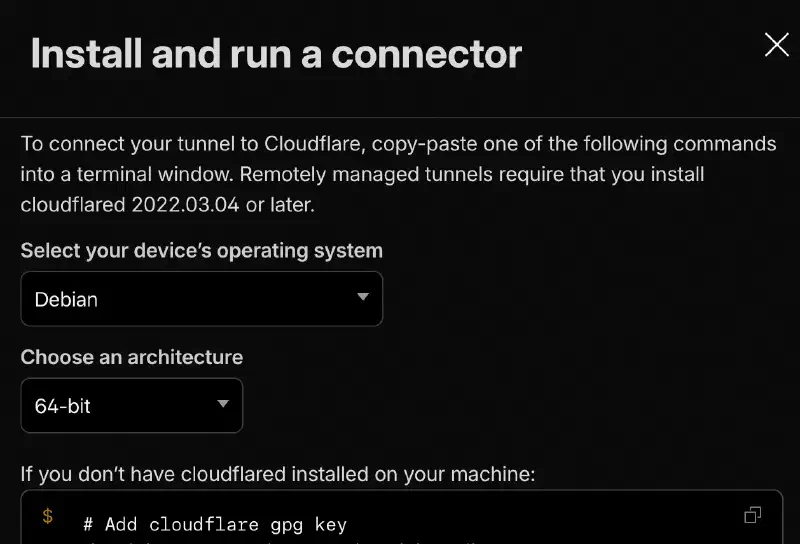
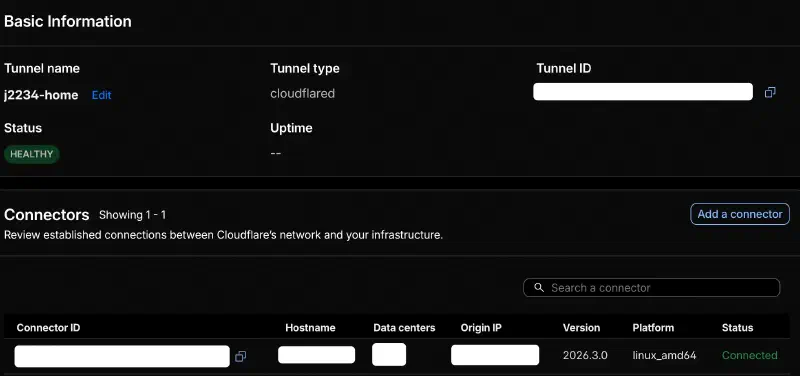
In Connector, you only need to specify the operating system that will be attached to the tunnel, and Cloudflare will provide all commands for you. Run those commands on the server. Once it is complete, the Connector will appear in the Tunnel dashboard.
Published application routes#
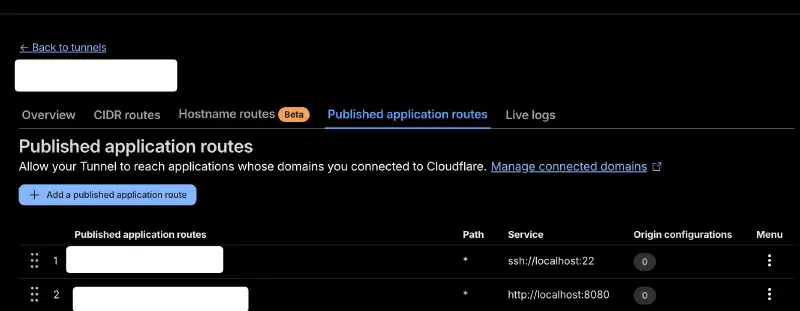
Connect the Tunnels created earlier to a Cloudflare domain. Think of it as connecting a domain to a specific service on host when the Connector is installed.
To access it from outside through HTTP and SSH, I mapped http://localhost:8080 and ssh://localhost:22 on the home server to separate domains.
Checking the Connection#
Web Server#
The web server can now be accessed from anywhere in the world through a browser. Ubuntu has Python by default, so start a temporary server with python3 -m http.server 8080 and test it.
SSH#
For SSH, connect from local SSH using cloudflared as a proxy.
ssh -o ProxyCommand="cloudflared access ssh --hostname %h" linux_user@ssh_domainInstalling cloudflared on Mac
You can install it simply with one line: brew install cloudflared
Access Control#
At this point, anyone can try to connect to SSH on my home server. Of course, since only I know the authentication information, actually breaking in should be impossible, but I still don’t like that connection attempts are possible. In this case, Cloudflare Access can be used to block SSH connection attempts from unauthenticated users.
If you register the domain for my SSH under Access Control > Applications, you can attach various Access policies to it, such as IP-based rules, email authentication, and tokens.
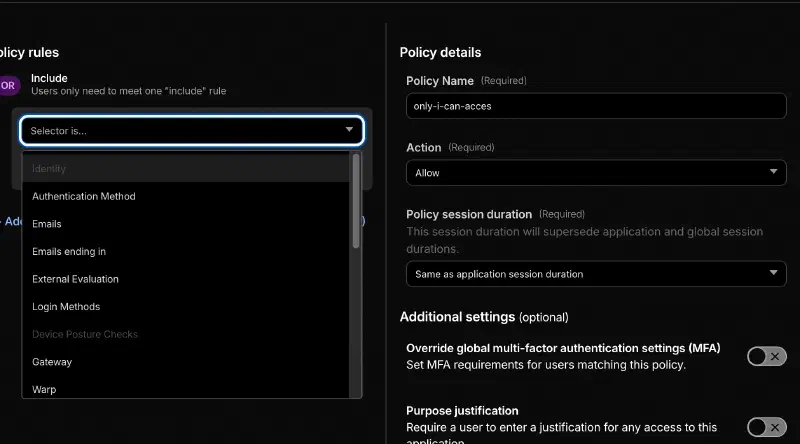
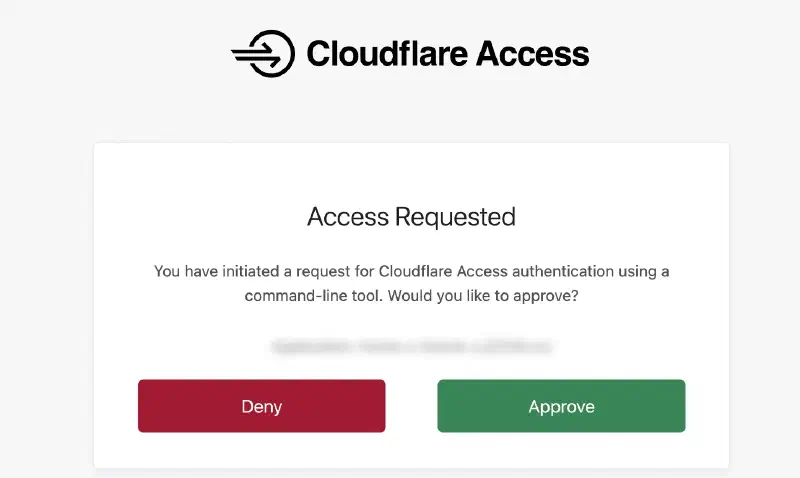
Since I’m going to be the only one using SSH anyway, I chose the simplest email authentication method. After attaching the policy, when I try to connect via SSH, a browser window opens and asks me to authenticate by email. Once that is done, I can finally connect via SSH from the terminal.
Final#
Cloudflare’s free plan really seems to offer a huge amount of value. I had already been using R2, Proxy, and Functions pretty well, but after setting up Tunnel too, it feels even more real. Of course, when using it in Korea, there is an issue where traffic has to go through overseas routes and the speed drops[^1 ], but I’m still very satisfied just by the fact that these features are available.
3-point#
- I finished setting up the external access environment through Cloudflare.
- The home server setup is now done, and all that is left is to play around with it.
- Cloudflare is god.